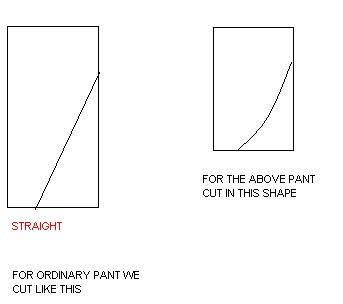
stitching a pant ,goes more easy if u followed the
shorts tutorial.
whenever u sit to draft something new,just go through the old drafting in ur mind. compare the old one and the new one. find the similarities.
divide our body into two parts .1 upper part
.2 lower part
in our last two posts we went through the lower part tutorials and this deals with the same.
cloth needed = double of the length+3 and a half inch
- 1 MEASURING
- 2 CALCULATING
- 3 FOLDING
- 4 DRAFTING
- 5 CUTTING
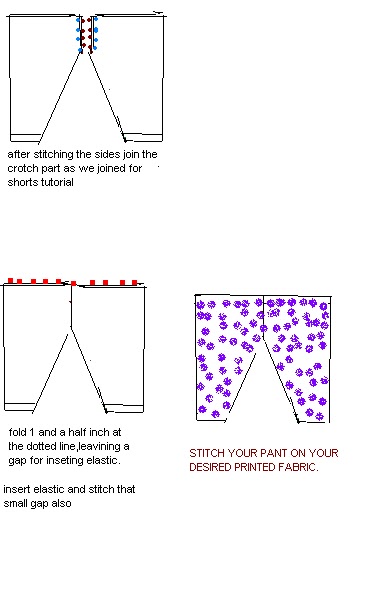
- 6 STITCHING
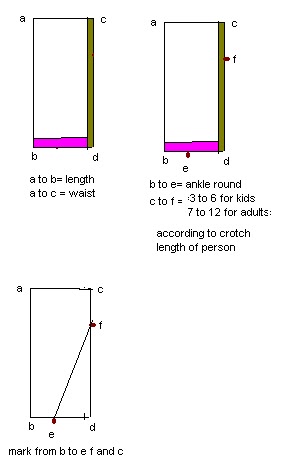
.1 MEASUREMENTS needed are
.1 LENGTH
.2 WAIST
.3 ANKLE
2.CALCULATING
.1 length = length+ 3 and a half (length =from waist to ankle)
.2 waist = waist/4 +1.25 inch
.3 ankle = ankle round+2.25 inch( u can add some more inches if u prefer loose fitting(or add bell shaped cutting for bell bottoms) . or u can make the fitting tight too by adding only 2 inches to the ankle round .but don forget to check whether u can wear the pant comfortably through your legs or not).
.3 FOLDING
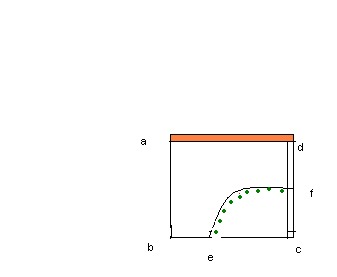
4. DRAFTING
5.CUTTING


